Create Multiple Campaigns
Everything you need to know to create multiple campaigns in batch on Merkl
While Merkl Studio is ideal for creating single campaigns, Merkl also provides tooling for campaign creators who need to create multiple campaigns at once.
This guide covers all available methods, from the visual Batch Studio interface to programmatic API approaches.
All methods involve working with campaign configurations - whether you're using Studio, API templates, or building configurations from scratch.
Global Settings
When creating multiple campaigns in a batch, certain parameters are shared across all campaigns:
Fixed Parameters (cannot be modified per campaign):
- Reward Token: The token used for rewards across all campaigns
- Reward Chain: The chain where rewards will be distributed
- Campaign Manager: The address managing the campaigns
Customizable Parameters (can be modified per campaign):
- Campaign Dates: Start and end timestamps can be customized individually for each campaign
These global settings apply to all methods described below, whether using Batch Studio or the API.
Best Practices
Before diving into the specific methods, here are some general best practices for creating multiple campaigns:
- Keep batches under ~20 campaigns to avoid transaction size issues on most chains
- When reusing configurations from existing campaigns, pay attention to blacklists that may be inherited. Review and update them as needed for your new campaigns
Workflow on the batch studio
Access: https://studio.merkl.xyz/batch
The Batch Studio provides an interface for creating multiple campaigns at once.
Global Settings (orange zone on the interface) correspond to the Global Settings described above. The reward token, reward chain, and campaign manager are fixed at the batch level and cannot be modified per campaign. Campaign dates can be customized individually for each campaign.
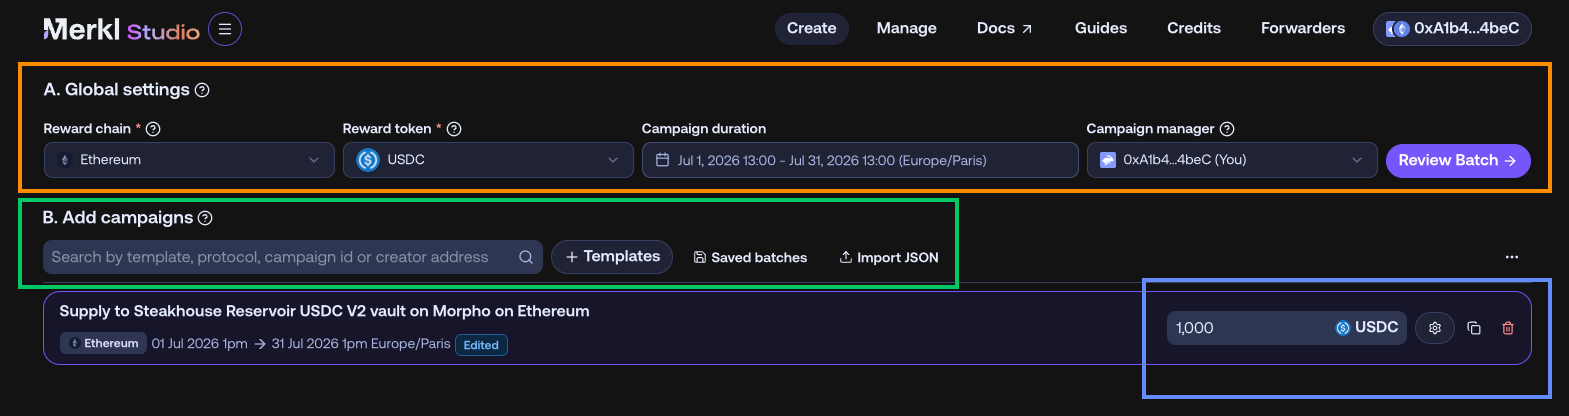
1. Add Campaigns (green zone on the interface)
Use protocol templates (e.g., "Aave Borrow", "Uniswap V3") from the search bar, search by campaign ID or creator address, or import a JSON file with pre-configured campaigns.
- Protocol templates: Search by protocol name (e.g., "Aave", "Uniswap") to see all available campaign types for that protocol. Each template contains a complete base configuration with core parameters pre-filled. When you select a template, a popup appears asking you to fill in the required fields, including reward distribution method and protocol-specific fields such as pool address (for DEX pools), market address (for lending protocols), or token weights (for CLAMM).
- Campaign ID or Creator Address: Search by existing campaign ID or creator address to import a complete campaign configuration. Use Edit settings (blue zone on the interface) to customize any parameters, including campaign dates per campaign within your batch.
- Import JSON: Import a JSON file with pre-configured campaigns.
2. Configure & Customize
In the blue zone on the interface, define the number of tokens to distribute for each campaign. Click Edit settings for advanced configuration on any campaign, notably to modify campaign dates per campaign if you want different timeframes within your batch.
3. Review & Launch
Click Review Batch to verify your configuration, then Launch Batch (EOA wallets) or Download Payload (Safe wallets). Once you have a payload, refer to Create a Campaign from a Multisig or Gnosis Safe for execution instructions.
Creating campaigns programmatically
You can also create batches using the Merkl API alone, generating the transaction payload from full campaign configurations — the programmatic equivalent of the Batch Studio.
For the step-by-step API flow, see Crafting campaigns in our developer docs.